Home Page |
Writings Index
Workshop Tour
By: Doug Bittinger - August 24, 2009
We do occasionally have people come and want a tour of our
shop. Sometimes they are prospective customers, but
mostly they are fellow woodworkers who found our web site and
wanted to see where we create all those pretty things.
In all honesty, most of the time we think they leave
disappointed in what they found here. Perhaps they were
expecting one of those showcase shops that well-off hobbyists tend to
build or more of a factory environment with huge equipment
and a large commercial building. Our workshop is neither
of these. Quite the opposite in fact, as you will see.
 But first, a little
history. We moved here from St. Louis MO. in
December of 1999. This place was not at all what we
were looking for but God stepped in, changed our plans and
we purchased this property: almost 5 acres of sloping, wooded
mountainside with about 1 acre cleared. It had a nice
16x77 mobile home, a cinder-block garage that was wired and
lighted as a workshop, and a good well and septic system in
place. We moved in thinking that we'd live in the
mobile home for a year or so while we prepared a spot to
build a real house, then sell the mobile home, pour a slab
and erect a large steel building adjacent to the garage for
use as a workshop. It did not work out that way. But first, a little
history. We moved here from St. Louis MO. in
December of 1999. This place was not at all what we
were looking for but God stepped in, changed our plans and
we purchased this property: almost 5 acres of sloping, wooded
mountainside with about 1 acre cleared. It had a nice
16x77 mobile home, a cinder-block garage that was wired and
lighted as a workshop, and a good well and septic system in
place. We moved in thinking that we'd live in the
mobile home for a year or so while we prepared a spot to
build a real house, then sell the mobile home, pour a slab
and erect a large steel building adjacent to the garage for
use as a workshop. It did not work out that way.
 It wasn't until 2007 that we got to build our
house, during those six years we were working out of the
cinder block shop the size of a 1½ car garage.
It was snug. No, it was very snug and it had no
insulation at all so it was very cold in winter and hot in
summer. We didn't want to put money into improving the garage
because we were always convinced that building our house was just
around the corner and insulating the garage would just be a waste
of financial resources. But things just kept happening to
delay that. Once we were finally moved out of the mobile home
we found we would not be able to get what we had hoped for by
selling it, not nearly enough to cover the now much inflated
price of pouring a large reinforced concrete slab and buying a 1200
Sq.Ft. steel building. So, we decided to recycle what we had, and
convert the mobile home into our new 1232 Sq.Ft. workshop. And it
really has worked out very well. It wasn't until 2007 that we got to build our
house, during those six years we were working out of the
cinder block shop the size of a 1½ car garage.
It was snug. No, it was very snug and it had no
insulation at all so it was very cold in winter and hot in
summer. We didn't want to put money into improving the garage
because we were always convinced that building our house was just
around the corner and insulating the garage would just be a waste
of financial resources. But things just kept happening to
delay that. Once we were finally moved out of the mobile home
we found we would not be able to get what we had hoped for by
selling it, not nearly enough to cover the now much inflated
price of pouring a large reinforced concrete slab and buying a 1200
Sq.Ft. steel building. So, we decided to recycle what we had, and
convert the mobile home into our new 1232 Sq.Ft. workshop. And it
really has worked out very well.
 Because the mobile home featured a very spacious,
open floor plan where the living room, kitchen and dining
area were all one large space, we didn't have to risk
weakening it by tearing out any walls at all. The
kitchen/dining area was raised up above the rest of the floor
and featured oak flooring to provide a visual
"separation" between spaces. To convert this
area to a machine tool room only required removing the carpeting in
the former living room and building a raised floor to level things up
and removing the appliances and most
of the cabinetry from the kitchen. This tool room alone is
larger than our entire garage workshop! And the new shop is
insulated, has central heat and air conditioning, wooden floors
instead of concrete, and it never floods out in heavy rains like
the old one did. Because the mobile home featured a very spacious,
open floor plan where the living room, kitchen and dining
area were all one large space, we didn't have to risk
weakening it by tearing out any walls at all. The
kitchen/dining area was raised up above the rest of the floor
and featured oak flooring to provide a visual
"separation" between spaces. To convert this
area to a machine tool room only required removing the carpeting in
the former living room and building a raised floor to level things up
and removing the appliances and most
of the cabinetry from the kitchen. This tool room alone is
larger than our entire garage workshop! And the new shop is
insulated, has central heat and air conditioning, wooden floors
instead of concrete, and it never floods out in heavy rains like
the old one did.
There is a door on
either side of the tool room, a large door exiting to a long
porch and a standard door on the opposite side leading to a
long drop to the ground. That is a fire exit only for now.
One day we'd like to add a room on there to serve as a showroom where
we can display a few pieces of our work for visitors.
 Just
inside the main door where we bring lumber in from the stacks
outside is a miter saw station. I built it atop the old
buffet counter, and cut a hole in the stub-wall at the left
end to allow long boards to poke through into the assembly
room. The tool box on the right end sits back behind
the path of boards sitting on the chop saw bed. We use
this for breaking down long boards into more manageable
pieces after laying them out for parts. Of course we can
also use it to cut miters on the ends of parts. Just
inside the main door where we bring lumber in from the stacks
outside is a miter saw station. I built it atop the old
buffet counter, and cut a hole in the stub-wall at the left
end to allow long boards to poke through into the assembly
room. The tool box on the right end sits back behind
the path of boards sitting on the chop saw bed. We use
this for breaking down long boards into more manageable
pieces after laying them out for parts. Of course we can
also use it to cut miters on the ends of parts.
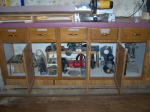 The drawers and cabinets under the chop saw are
used for tool storage. Common hand tools are in the drawers and
my small power tools in the cabinets below. All are easily
accessible, convenient to my workbench, yet out of the way and protected
from collecting airborne dust. The drawers and cabinets under the chop saw are
used for tool storage. Common hand tools are in the drawers and
my small power tools in the cabinets below. All are easily
accessible, convenient to my workbench, yet out of the way and protected
from collecting airborne dust.
 Across the aisle from the chop saw is
my workbench. I built it myself; it's ugly but it
is heavy and very stable. It has a side vice and an end
vice, both have bench dog holes bored in the top to allow me
to secure a board for planing, sanding, chiseling or
whatever. I use the space underneath to store short
cut-offs; by keeping them where I can easily grab them when
needed i find I actually use them. If they were out in
the lumber shed I would not make the effort to go out and
look through them nearly as much. An island used to be
mounted here, and I kept the electrical wiring that came up
through the floor intact, ran
it up inside one leg of the bench and mounted the outlet on
the bench so we have easy access to power for the lamp and
small power tools. The drawers and cabinets under the
chop saw station store hand tools and measuring
devices. Long measuring devices hang above the counter
at the end next to the pass-through hole. Across the aisle from the chop saw is
my workbench. I built it myself; it's ugly but it
is heavy and very stable. It has a side vice and an end
vice, both have bench dog holes bored in the top to allow me
to secure a board for planing, sanding, chiseling or
whatever. I use the space underneath to store short
cut-offs; by keeping them where I can easily grab them when
needed i find I actually use them. If they were out in
the lumber shed I would not make the effort to go out and
look through them nearly as much. An island used to be
mounted here, and I kept the electrical wiring that came up
through the floor intact, ran
it up inside one leg of the bench and mounted the outlet on
the bench so we have easy access to power for the lamp and
small power tools. The drawers and cabinets under the
chop saw station store hand tools and measuring
devices. Long measuring devices hang above the counter
at the end next to the pass-through hole.
 Our ancient table
saw sits in the middle of the far end of the tool room,
giving me enough space all around to work with lumber.
Setting it on the raised deck portion of the room allowed me
to run a 4" dust collection pipe under the floor so it
is never in the way as we cut lumber or even sheet
stock. It's old, but still very solid and reliable. Our ancient table
saw sits in the middle of the far end of the tool room,
giving me enough space all around to work with lumber.
Setting it on the raised deck portion of the room allowed me
to run a 4" dust collection pipe under the floor so it
is never in the way as we cut lumber or even sheet
stock. It's old, but still very solid and reliable.
 Our big band saw (16") sits
on the opposite side of the main door from the chop
saw. Bands and jigs hang on the wall behind it.
This saw has enough throat height and power to resaw 10"
wide hardwood boards, yet by mounting a thin, fine tooth
blade we can also do delicate scroll work. Our big band saw (16") sits
on the opposite side of the main door from the chop
saw. Bands and jigs hang on the wall behind it.
This saw has enough throat height and power to resaw 10"
wide hardwood boards, yet by mounting a thin, fine tooth
blade we can also do delicate scroll work.
 On the same wall, past the
window next to the bandsaw, tucked up in the corner of the
tool room is our stretched midi lathe. We don't do a
lot of turning anymore, so we've never seen the value in
buying a bigger lathe. In fact, this lathe is the one I
used to turn the 75 inch tall bed posts for the Kiana
bed. It had plenty of muscle for that job, I just
needed to get clever about making the posts in
sections. The lathe sits on a rolling stand of my own
design that also has a rack to keep our turning tools at hand,
and a shelf under for fixtures and accessories. Right
now, left-over lumber from past projects is encroaching on
it's workspace, I need to get that stuff hauled back out
to the lumber stacks. On the same wall, past the
window next to the bandsaw, tucked up in the corner of the
tool room is our stretched midi lathe. We don't do a
lot of turning anymore, so we've never seen the value in
buying a bigger lathe. In fact, this lathe is the one I
used to turn the 75 inch tall bed posts for the Kiana
bed. It had plenty of muscle for that job, I just
needed to get clever about making the posts in
sections. The lathe sits on a rolling stand of my own
design that also has a rack to keep our turning tools at hand,
and a shelf under for fixtures and accessories. Right
now, left-over lumber from past projects is encroaching on
it's workspace, I need to get that stuff hauled back out
to the lumber stacks.
 Across the room from these two
tools is our home made router table -- made from an antique
mahogany sewing machine cabinet. It about broke my
heart to go cutting up such a lovely piece of furniture, but
Marie said she had no room for it in the house, they were
"a dime a dozen" so she would get nothing from
trying to sell it and if I had no use for it she was going to haul
it off to the dump. So I converted it for use with a
3¼ HP Triton plunge router. We can tip up the left leaf
for easy access to the router if needed, but because this router
features above the table bit changes, and depth adjustments
are unusually easy to accomplish, we rarely have to lift the
top. The drawers offer storage for accessories, bits
store in the cabinet and on hooks on the wall behind the
table. You can also see some of the jigs and templates
we have hanging along the walls, anything we expect to make
again gets templates and jigs made up so it will be easier
next time. Across the room from these two
tools is our home made router table -- made from an antique
mahogany sewing machine cabinet. It about broke my
heart to go cutting up such a lovely piece of furniture, but
Marie said she had no room for it in the house, they were
"a dime a dozen" so she would get nothing from
trying to sell it and if I had no use for it she was going to haul
it off to the dump. So I converted it for use with a
3¼ HP Triton plunge router. We can tip up the left leaf
for easy access to the router if needed, but because this router
features above the table bit changes, and depth adjustments
are unusually easy to accomplish, we rarely have to lift the
top. The drawers offer storage for accessories, bits
store in the cabinet and on hooks on the wall behind the
table. You can also see some of the jigs and templates
we have hanging along the walls, anything we expect to make
again gets templates and jigs made up so it will be easier
next time.
 Just
around the stub wall from the router table is our 16/32
wide drum sander. This is an invaluable tool for
smoothing and surfacing wide panels, but we've found many
other uses for it as well. Like most everything in this
shop, it is mounted on lockable casters so it can be moved
around if needed, but it also has a place where it
"lives" most of the time. The
"crutch" sticking out above is a support arm for a
4" dust collection hose that is plugged into the top of
the sander whenever it is being used. Just
around the stub wall from the router table is our 16/32
wide drum sander. This is an invaluable tool for
smoothing and surfacing wide panels, but we've found many
other uses for it as well. Like most everything in this
shop, it is mounted on lockable casters so it can be moved
around if needed, but it also has a place where it
"lives" most of the time. The
"crutch" sticking out above is a support arm for a
4" dust collection hose that is plugged into the top of
the sander whenever it is being used.
Also in this shot, sitting along the back side of our
workbench is our 8" x 76" jointer.
This was our first adventure into Grizzly tools. For
years I'd have nothing to do with them because of their
poor reputation. But recently The tool reviews in the
woodworking magazines have started giving them passing
marks. Then, when the smaller brother of this jointer
took a major magazine's "Top Tool" award, we decided it
was time to give them a try. This 8" is a
scaled up version of the tool that got the award, and
we've been very happy with it. Of course I'd
have been just as happy with a Powermatic, but it would have
cost us 3 time as much!
 The 16/32 drum sander
is actually the start of our "Sanding Area" which
includes a stationary belt sander and our drill press that
can be fitted with a wide variety of sanding drums and wheels.
I've even built a special table for the DP that allows
sanding dust to be pulled out the bottom by our shop
vac. In this position, the drill press is also very
handy for use in parts making; either drilling holes or
when fitted as a mortising machine. Space is reserved
next to the stationary belt sander for an oscillating spindle
sander, which will be our next tool purchase. At the
opposite end from the 16/32 sander is a spot reserved for a
stand-alone mortising machine, which probably WILL be a
Powermatic. The 16/32 drum sander
is actually the start of our "Sanding Area" which
includes a stationary belt sander and our drill press that
can be fitted with a wide variety of sanding drums and wheels.
I've even built a special table for the DP that allows
sanding dust to be pulled out the bottom by our shop
vac. In this position, the drill press is also very
handy for use in parts making; either drilling holes or
when fitted as a mortising machine. Space is reserved
next to the stationary belt sander for an oscillating spindle
sander, which will be our next tool purchase. At the
opposite end from the 16/32 sander is a spot reserved for a
stand-alone mortising machine, which probably WILL be a
Powermatic.
As we walk around the end of the work bench, back toward the
chop saw, a series of cabinets are mounted in the wall to our
left, these contain an assortment of odds and ends that don't go
anywhere else, including a crock pot for cooking hide glue, a tea
kettle for making steam, a stock pot for boiling small parts and an
assortment of dust collection pipe cut-offs.
And that does it for the tool room.
 Through the large doorway that used to be
double doors into the master bedroom, we go into the assembly
room. This is essentially an empty room most of the
time. We keep several folding tables in here so we can
configure it to our needs depending on what we are
building. Another fixed workbench would be great when
were working on small stuff, but when we're assembling
something like Blake's large curio cabinet of Jeff's
monster bed, we need every inch of floor space
available. Hardware is all in a bin system and peg
hooks on one wall. A large cabinet stores supplies and
tools next to that and an assortment of roller dollies are kept
in here to assist in moving large pieces around. Through the large doorway that used to be
double doors into the master bedroom, we go into the assembly
room. This is essentially an empty room most of the
time. We keep several folding tables in here so we can
configure it to our needs depending on what we are
building. Another fixed workbench would be great when
were working on small stuff, but when we're assembling
something like Blake's large curio cabinet of Jeff's
monster bed, we need every inch of floor space
available. Hardware is all in a bin system and peg
hooks on one wall. A large cabinet stores supplies and
tools next to that and an assortment of roller dollies are kept
in here to assist in moving large pieces around. In one corner of the assembly
room is a small table where we store all our glues and
adhesives, also a small cordless screw driver that is used in
the assembly process. In one corner of the assembly
room is a small table where we store all our glues and
adhesives, also a small cordless screw driver that is used in
the assembly process. In the opposite corner are
our clamp racks. Woodworkers never have enough clamps,
so we bought extra racks that can be put up as the need arises,
but this is a pretty good collection and serves most of our
needs. Putting them here makes them easily accessible
from the tool room too, when we need a clamp or two to help
hold things in place on one of the tools or the
workbench. The wall space between the gluing station
and the clamp racks is deliberately left empty as a place
where we can hang plain white flat bed sheets as a back
ground for taking photos of our work. Eventually
we'll paint over the girly wallpaper with a matte white
paint, then we should not need the sheets any more. In the opposite corner are
our clamp racks. Woodworkers never have enough clamps,
so we bought extra racks that can be put up as the need arises,
but this is a pretty good collection and serves most of our
needs. Putting them here makes them easily accessible
from the tool room too, when we need a clamp or two to help
hold things in place on one of the tools or the
workbench. The wall space between the gluing station
and the clamp racks is deliberately left empty as a place
where we can hang plain white flat bed sheets as a back
ground for taking photos of our work. Eventually
we'll paint over the girly wallpaper with a matte white
paint, then we should not need the sheets any more.
 On through the glass double doors into what was
the master bath and is now the finishing room. This is
the first time EVER that I've had a finishing room that
could be closed off and kept clean even while woodworking was
going on in the rest of the shop. The 36" spinner
atop the folding workbench can be removed and fitted with the
cross-base sitting next to the workbench for working with
taller pieces. When not needed the base parts can be
separated and laid flat against a wall. I've also
built a number of special drying fixtures to help in holding
odd things while they are being finished, at the right side
of the photo is a rack I built to hold about 20 pair of bag
handles while they're being oiled. This room is at
the very back end of the mobile home. On through the glass double doors into what was
the master bath and is now the finishing room. This is
the first time EVER that I've had a finishing room that
could be closed off and kept clean even while woodworking was
going on in the rest of the shop. The 36" spinner
atop the folding workbench can be removed and fitted with the
cross-base sitting next to the workbench for working with
taller pieces. When not needed the base parts can be
separated and laid flat against a wall. I've also
built a number of special drying fixtures to help in holding
odd things while they are being finished, at the right side
of the photo is a rack I built to hold about 20 pair of bag
handles while they're being oiled. This room is at
the very back end of the mobile home.
 Way at the other end
a short hallway leads off the tool room, past the restroom to
our office / lounge. The office space is minimal; just a
desk, a couple of chairs and a file cabinet. But from
here we administer the business, correspond with customers
and design our creations. This computer is the nerve
center of our computer network, three others are connected
either through Ethernet cabling or wireless connection to
provide communications access in the other buildings on our
property. Way at the other end
a short hallway leads off the tool room, past the restroom to
our office / lounge. The office space is minimal; just a
desk, a couple of chairs and a file cabinet. But from
here we administer the business, correspond with customers
and design our creations. This computer is the nerve
center of our computer network, three others are connected
either through Ethernet cabling or wireless connection to
provide communications access in the other buildings on our
property. What we laughingly call our Employee
Lounge is the other end of the room and consists of a low
cabinet holding a mini-fridge
and coffee maker, a couple of book cases holding reference
books and magazines, a Solo-flex machine to help keep the
flab off and working off frustration when we find we've
cut a board three times and it's STILL too short, and of
course a soft spot for our "employees" Dolly and
Zadie to nap. It is rarely vacant. What we laughingly call our Employee
Lounge is the other end of the room and consists of a low
cabinet holding a mini-fridge
and coffee maker, a couple of book cases holding reference
books and magazines, a Solo-flex machine to help keep the
flab off and working off frustration when we find we've
cut a board three times and it's STILL too short, and of
course a soft spot for our "employees" Dolly and
Zadie to nap. It is rarely vacant.
If we go out the main door we'll find a long, narrow side
porch which is currently being used to store all manner of
unsightly stuff and we really ought to find someplace else to
put it or get rid of it, but we have no place else for it to
go and it's not junk so we don't want o get rid of
it. So, we've become hillbillies... at least we
don't have a sofa out there!  I've also added a
loading dock off the porch straight out from the doors.
This allows us to roll furniture on dollys out the doors and
into our truck. Speaking of dolly's, Dolly likes to
guide us as we back the truck in to the dock for
loading. The plan is to build a roof over the dock, and
supportive framing is in place, but the roof is not, as yet. I've also added a
loading dock off the porch straight out from the doors.
This allows us to roll furniture on dollys out the doors and
into our truck. Speaking of dolly's, Dolly likes to
guide us as we back the truck in to the dock for
loading. The plan is to build a roof over the dock, and
supportive framing is in place, but the roof is not, as yet.
 When we buy a truck
load of lumber it comes to us as fresh sawn planks that we
must sticker-stack on a rack so that air can flow all around
each board and allow it to dry evenly. Here Doug has
just finished racking 900 board feet of fresh sawn Cherry
lumber. It will take between one and two years before this
lumber is ready to use. When we buy a truck
load of lumber it comes to us as fresh sawn planks that we
must sticker-stack on a rack so that air can flow all around
each board and allow it to dry evenly. Here Doug has
just finished racking 900 board feet of fresh sawn Cherry
lumber. It will take between one and two years before this
lumber is ready to use.  In order to supply our needs while the new
lumber dries, we must keep many stacks of lumber
available. We normally stock 8 species of wood, to keep
from having to continually re-stack the older wood on top of
the new wood, we try to buy enough to make a new stack with
each delivery. We want to get all of this under a roof
eventually so we don't have to mess with the tin roofing panels
every time we pull lumber. In order to supply our needs while the new
lumber dries, we must keep many stacks of lumber
available. We normally stock 8 species of wood, to keep
from having to continually re-stack the older wood on top of
the new wood, we try to buy enough to make a new stack with
each delivery. We want to get all of this under a roof
eventually so we don't have to mess with the tin roofing panels
every time we pull lumber.
 Selecting lumber for a project is enough of
a chore without having to deal with rain or snow and wind as
well. Lifting the tin sheets off in any kind of wind
can prove disastrous; they'll take your head off quite
easily. Selecting lumber for a project is enough of
a chore without having to deal with rain or snow and wind as
well. Lifting the tin sheets off in any kind of wind
can prove disastrous; they'll take your head off quite
easily.
 That takes care of the business end of
things, but also in our little compound are several more
buildings. This one is the house we put in during 2001 so we
could move my Mom and Step-Dad
out here from Nebraska. They were getting to where they needed
some help, we didn't want to go live in Nebraska, so
we brought them here. It was quite an adjustment for them at
first, but they're glad they did now. The little barn was
put in about the same time as storage for lawn care equipment
and overflow storage for Mom. That takes care of the business end of
things, but also in our little compound are several more
buildings. This one is the house we put in during 2001 so we
could move my Mom and Step-Dad
out here from Nebraska. They were getting to where they needed
some help, we didn't want to go live in Nebraska, so
we brought them here. It was quite an adjustment for them at
first, but they're glad they did now. The little barn was
put in about the same time as storage for lawn care equipment
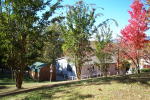
and overflow storage for Mom.  In 2007 we finally
got to build a house for ourselves; a cozy bungalow. It
isn't big or
ornate; we tend to be non-traditional about home purchasing in
that every time we've moved, it's been into SMALLER
not larger quarters. Less to clean, less to maintain,
less space to collect unneeded stuff, and as we get older that
will surely be more and more of a
blessing. Besides, what we did not spend on more square
footage we put into improved insulation and better
construction. Our utility bills are much lower than the
average. When this photo was taken the front steps
were still a work in progress. But I guess as
homeowners, we're never truly DONE with a house. In 2007 we finally
got to build a house for ourselves; a cozy bungalow. It
isn't big or
ornate; we tend to be non-traditional about home purchasing in
that every time we've moved, it's been into SMALLER
not larger quarters. Less to clean, less to maintain,
less space to collect unneeded stuff, and as we get older that
will surely be more and more of a
blessing. Besides, what we did not spend on more square
footage we put into improved insulation and better
construction. Our utility bills are much lower than the
average. When this photo was taken the front steps
were still a work in progress. But I guess as
homeowners, we're never truly DONE with a house.
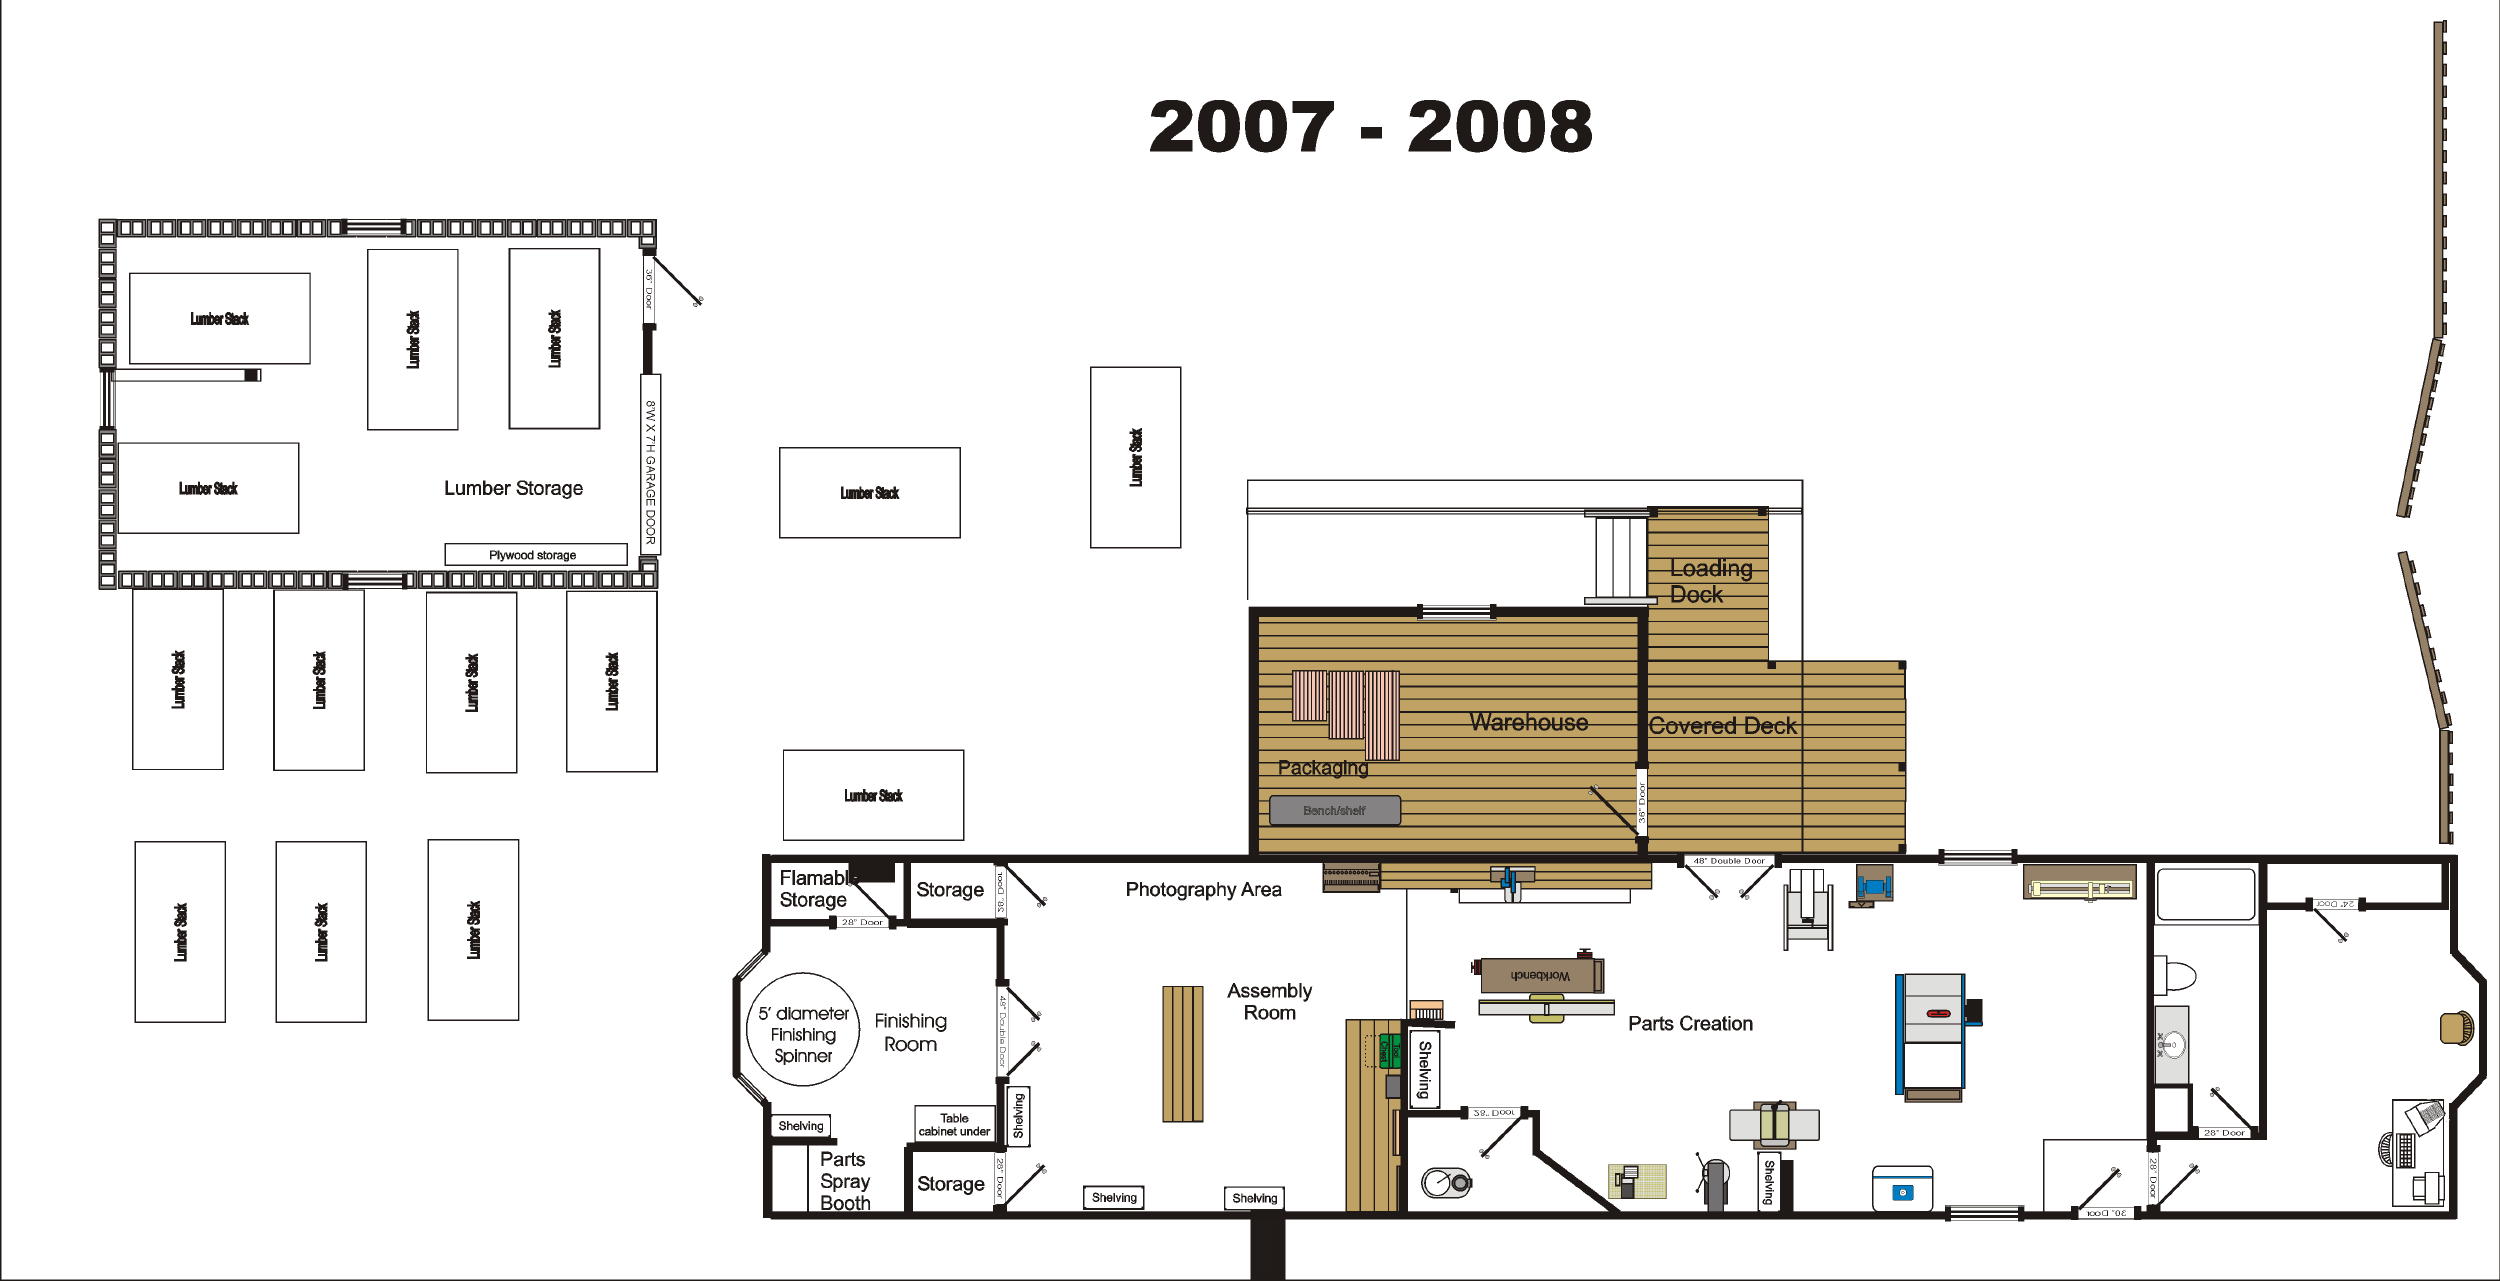
 Here is a floor plan drawing of our
shop to help you envision where things are in relation to one
another. Click the thumbnail picture to get the big one. Here is a floor plan drawing of our
shop to help you envision where things are in relation to one
another. Click the thumbnail picture to get the big one.
And that, dear readers is a whirlwind tour of our humble
"place". Like I said, it isn't fancy, but
it's ours, it's comfortable, and it's a great
place to work and live.
* * * * *
|