A Tale of Two Craties

Several months ago, Sigrid: a friend who has been involved in rescue for a long time gave us a large, heavy-duty crate. It was something she had used for many dogs but would not need any more because she was “slowing down”. It is quite large: 32″ high by 30 inches deep, by 42″ long and made of steel tubes and bars, not of welded wire. This crate, although “experienced” would stand up to most any dog, and we were grateful to get it. We did not have anything that sturdy.

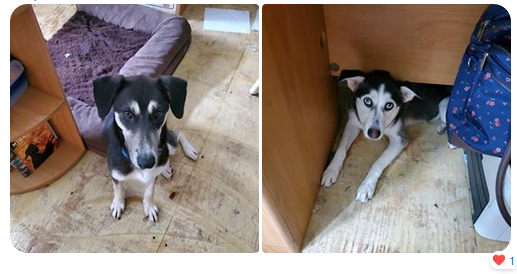
Blade is a Malamute. He is pretty good sized, though he is mostly fur. Blade can be … belligerent. Convincing him to go into a kennel is not usually easy. A crate is almost impossible. I have been house training him for a couple of months. When I must leave the house Blade goes to K4, an outside kennel, if the weather is fair or to the Mega Crate inside the Guest Cottage if it’s bitter cold or wet out. The Cottage keeps him warm and dry. As long as I have a lead on him, Blade is compliant, and will go into even the crate – errr, I mean the Mega Crate. He will NOT go into even the largest regular crate I have.

K4, Blades former outside room.

I would LIKE to get Blade to use a crate in the house, like Callie does, so I could free up K4 & Mega Crate for another dog to use.

A week ago Stacy, another rescue friend brought us another heavy-duty crate. It’s just a little smaller: about 2″ in depth and 3″ in length. But it’s brand-spanking new and it has WHEELS under it making it easier to clean beneath it. I felt sure it would be big enough for Blade, so we unloaded it into our house and I made room for it.

Blade disagreed. I put a lead on him and tempted him with a Soup Bone dog treat. He stuck his head inside for a moment then backed out, “Too small, Doug. A BIG dog like me needs more room.”

Mere inches if difference in size!

I reminded him that he’s not REALLY that big. Yeah, he’s large but it’s not like he’s 120 pounds. He’s 85 pounds. He looks bigger but he’s mostly fur. He just humphed at me and pretended to be inspecting a seam between two floor tiles.

I have not been able to convince him to go into the brand new but slightly smaller mega crate. And a situation has arisen where I really need that K4/Mega Crate combo in the Cottage. So, I decided to bite the bullet and swap them. I did that this morning.

The Stacy Mega Crate is now in the Cottage and available.
The Sigrid Mega Crate is in the house and Blade seems interested.

Yes: I need to put away the Christmas Tree. January has been a strange month around here and I am behind on many tasks. I also need to build a wheeled platform for Blades crate to sit on so I can move it to clean the floor under. That’s easy since another friend, John Kaprocki gave me a bunch of industrial grade casters a couple of years ago, and I have plywood out in the shop.

I have found that as long as I get a slip lead or a leash (slip lead is easier) on Blade he is amazingly compliant. And I did get him to go into his room for a while.

Not overly roomy!

This would not work for long term confinement, but for a while: when I have to go away to run errands (and don’t take him with me) or go to church, Blade will be fine here. And we now have a vacant, workable kennel/crate combination to offer to this other desperate doggo. A win-win situation.

Beagle Accosted

I find routine a valuable aid in training.

For our dogs, breakfast is at 6:00 am and dinner is at 5:00 pm. They may key these times to Marie’s movements. In the mornings Marie gets up about 5:45 and spends a few minutes dispensing belly rubs and ear scritchies. Dinner is always a few minutes before Marie gets home from work. If Marie gets off work early (as she did the day before Thanksgiving) the dogs panic when she comes in the door because they think I’ve neglected to feed them.

This morning Marie had just awakened and Josephine came in to nose-whistle at me and pound her little forepaws on my knee, “I . am . starving . to . DEATH. Feed . me . now.”

Callie Roo backed her up. I told them that it was not quite time yet. More paw pounding, “NOW . NOW . NOW.”

“Marie has just awakened. I’ll bet you have not even gotten your belly rub or ear scritchies.”

Josie stopped accosting me, as realization dawned. Then she trotted in to Marie. Afterall, one cannot properly dine with unscritched ears.

Kennel Update: Walk-Through

The ongoing kennel project has come to the point where I thought you might enjoy a walk-through.  It is no where near finished, but progress is being made.  I am thrilled to be able to offer our residents secure, heated “bedrooms” to stay in on the cold winter nights that are coming.

Ready to go?

So, what do you think?  Please leave a comment below.

Kennel Update: Guillotines

Our Board of Directors approved the purchase of three Kennel Clad guillotine kennel doors.  You’ll know why they’re called that when you see the video.  I ordered them and they arrived quickly.  I spent my afternoon today installing the first one.  It went into Rebel’s bedroom.

I wanted Rebel to go out into his outer room so I could open his inner door and work less encumbered by having to open and close the door every time I went in or out.  But Rebel was having none of that.

However, he perched himself on his bed and lounged there watching me work.  He never got in my way and never tried to squeeze out the door with me.  He watched intently as I worked as though it was the most fascinating thing he’d ever seen.  He was SO adorable!

There were several challenges to overcome.  The biggest was the fact that the walls I’m mounting the door slides on are not even close to be being flat.  Warping the rails causes the door to bind.  I got around that by shimming the rails where needed.  Fortunately, as a former furniture maker, I have a fair stock of ultra thin pieces of wood laying around to stack up for the perfect shims.

It took me a couple of hours to unpack the boxes, decide what tools I needed, get everything staged, and then install the first door.  But the end result is satisfactory.  I should probably go buy some sheet metal to cut up for shims instead of using wood shims: wood will rot.

The final door has been installed and is working properly.
Check out my Walk Through video for the result.

Kennel Update: K2 is move-in ready

Some time ago Debbie Ramey, who rescues dogs and horses was renovating her horse barn and had a bunch of 5 feet wide by 6 feet high American Kennel Club welded wire kennel panels in there that she wanted to be rid of.  She asked me if I could make use of them here at Piney Mountain Foster Care.  Oh, yes, I could!  So she donated them to us and my friend, Trucker Tim, and I went down there with his truck and trailer, loaded all those panels on his trailer, and hauled them back here.

K4 For short term and emergency housing

Tim lives near by.  Tim also has a barn.  A barn with lots of extra space inside.  He offered to let me store this trove of panels in his barn where they would be out of the weather until I found ways to use them all.  I used 6 of them (one with a door in it) to build kennel 4.  The rest went into Tim’s barn.

With the north wall of Kennel 2 Inside complete I just need a front panel for it to make it usable.  The 10 foot long kennel panels I have on hand are too long for this application.  One of those worked okay on Kennel 1 while I built a proper front panel with door, but in this position it just won’t work.  I am rapidly filling up the empty space that was created by selling  the stack of white oak lumber.  So I went down to Tim’s place and retrieved a few of those 5 foot panels.  I mounted 3 conduit hangers, which I use to attach the tubing frames to the concrete walls with concrete screws, in the opening.  Then I used those as a hinge for the 5 foot panel.  I hold the other end tight to the wall on the other side of the opening with rubber straps to keep the dog inside.  This is just until I get a proper front panel with door built.

Then I got Josie’s Karunda dog bed and water bowl out of her outside kennel (K1) and moved it into the new inside space (K2) — leaving  the barrier I have over the small door between inside and outside areas because Blade is still in  K2 Outside.  I took out the small igloo style dog house that was in K1 Outside for Josie and assembled a large one in there for Blade.

Josie had been running in the play yard while I did all this.  Now it was time to get her back into K1 outside and let Blade out for his turn.  While he played with Blondie Bear I removed his Karunda and water bowl out onto the sidewalk outside the kennels, closed the outside door to K2 and removed the barrier between K2 Outside and K2 Inside.  Then I removed  the barrier to K1 Outside and moved Josie into K2 Inside through the kennel building and secured the makeshift door/front panel.  I put the K1 barrier back into place and went outside.

I moved Blade’s bed and water bowl into K1 Outside and called Blade to come get his treat and go into his room.

He came running, stopped short and gave me the side-eye, “That’s not MY room.  What are you trying to pull?”

The short version is that he became Blade the Belligerent and I had quite a time getting him into his new room.  But that’s another story.

Josie, on the other hand, was delighted with her new expanded living space.

Now when I give her a treat, instead of munching it down where she stands, like she always did before, she takes it to her inner sanctum, gets up on her bed and noshes on it there.  Also, she has been kind of bad about barking at anything that’s moving about in the woods above the kennels at night.  Last night she curled up in her “bedroom” and slept all night.  We didn’t hear a peep out of her.

I swapped Blade and Josie’s rooms because Kennel 1 does not have an inside room ready yet.  Blade has a plush coat of long fur to keep him warm.  Josie doesn’t.  Josie is still underweight too.  She needs this shelter for the cold snap we’ve got coming this week (Low of 20 predicted Tuesday night).  It’s just a couple of nights, then it warms up again.  By the time it turns cold again I should have Blade’s (new) room done as well.  Then everyone can get inside and away from the cold.

I need to sell another lumber pile.  That will free up some more space and give me funds to start buying insulation to go in the roof and buy paint for the walls.  Getting rid of the bare concrete block will go a long ways toward brightening the place up.

And doors.  I need to install guillotine doors that can be opened remotely via a cable and pulleys.  These will keep the cold and wind out at night and keep the dog inside or outside when I need to do that.

Step by step, we are getting there.


Kennel update: K2 wall complete

North wall of Kennel 2 complete.

I got the wall for Kennel 2 (Blades room) done this morning.  It’s not as pristine as my first wall, but the issues are probably not anything visitors will notice.  I notice because I’m a self-flagellating perfectionist.  But I know that, so I’ll move on anyway.  But first I need a rest, some Ibuprophen, and a meal to rebuild my energy reserves.

Work table, tools and supplies moved to K1

After lunch I moved my work station and tools out of K2, swept the floor in there, and set up my work table and tools in K1.

I had to rearrange my stack of blocks because (dummy me) the next wall goes right through that stack.  I remember thinking that I’d use enough blocks to shorten the stack enough to not impede the wall.  But I didn’t bother to count them.  I should have counted.  Not even close.

K2 lacks only an interior door panel to be usable.

The pass-through door in K2 remains blocked with crate board and a couple of propane cylinders because I don’t want Blade roaming around in here- or slipping out and running off while I have the roll-up door open.  Once I have a door across the front of that area, he will be allowed, if he chooses, to enter and utilize his inner sanctum.  I doubt he’ll make much use of it.  He prefers to be out on the front lines of the outer run to see as much as possible.

Once K2 was all squared away I laid in the first row of block for the kennel 1 north wall, making sure it is square and level.  I’ll let that set up good and hard to form a solid foundation for building the rest of the wall.

I’ve almost got my “mud slinging” technique down.  Almost.  The trick seems to be in getting the consistency of the mortar just right: wet enough it will cling to the trowel a little, but not so wet it sloughs off of the block after I scrape it onto the edge.  It needs to be the consistency of cake frosting.  Very gritty, dark gray cake frosting.  And there is a trick to moving the mortar from mortar bin to block without making it fall off on the floor or fly down the holes in the center of the blocks.  This is my first attempt at block laying and I’m working with knowledge I learned from watching YouTube videos.  I may be slow, but the end result seems to be good.  I’m happy with that.

If I don’t get this last wall done before it turns cold I can move Blade into K1 (Josie’s room) and Josie into K2.  I’ll go get a 5′ welded wire kennel panel out of Tim’s barn tomorrow (where I have stashed a bunch of them that were donated to us).  I can use that as a temporary interior door to K2 until I get the chain link frame installed and sheathed with mesh.  I’ll go into chain link mode once the blocks are laid and I can clear all those tools out of the way.  It’s getting tight in here!  Need to sell the rest of this lumber.

Blade doesn’t mind the cold.  He seems to prefer it.  With the full-body Parka he has for fur, I can understand why.  Josie is not so well insulated.  She needs the shelter.

I have found the vertically sliding doors I need to close off the small doorway between inside and outside runs.  They’re expensive: right at $200.00 each for the Standard version, over $300 for the insulated doors (I’ll skip those).  But they’re good quality: made by Kennel Clad for professional kennels and shelters and should last a long time.

There is another brand: Ecco(something) that makes doors for zoos, and are heavy duty enough to stand up to lions, and tigers, and bears (oh my!).  They come fully assembled using roller bearing tracks.  But they run in the $600 price range!  Although Blade thinks he’s a lion, we don’t need anything THAT heavy-duty.

There are cheaper ones, too.  Other brands can be had for as little as $60.00 per door.  But these are light plastic panels in sheet metal rails and do not come with hardware and cables.  My time working in a shelter proves to me that plastic doors get chewed up post haste and need to be replaced often.  The Kennel Clad doors are plate aluminum with aluminum frames, stainless steel fasteners, that ride in extruded aluminum rails that are heavy duty to resist dogs trying to bash through the door.  They will also stand up to frequent cleanings with disinfectants without rusting.

I need to get Board of Director approval to spend the money on them, but I want to get them ordered ASAP because heating a building with holes in the side is … problematic.

But for the moment, I’m building block walls.  I’ll focus on that until our Board meeting.

Zadie: the bilingual pirate dog

This was written in early 2012 for another web site, but I’m re-posting it here because it ties in with Cochise’s story and as a tribute to Zadie, whom we miss very much.

Zadie sleepingThis is Zadie.

Nah, she’s not spoiled, not a bit.

She does have an unusual vocal habit though. Many dogs will grumble as they settle down to sleep or roll over. But Zadie uses her grumbling to converse… but not in Dog. When we talk to her or ask questions (like we REALLY expect to get an answer!) she responds in this grumble speak of hers. But she has, apparently been spending too much time in the cow pasture up the road. Her grumble speak sounds for all the world like the lowing of those cows. I don’t mean just a little, but very much like it. Not a dog-like sound at all. I’m convinced she’s bilingual. Continue reading “Zadie: the bilingual pirate dog”

The Bookie

As you (probably) know, canine rescue is a passion of mine.  In learning to care for the dogs we’ve fostered over the past 8+ years, I often encountered dietary and nutritional challenges.  Finding solutions to those challenges opened the door to a LOT of research into dog food and the differences between food for humans and food for canines.  I even started making my own dog food!
This is today’s batch of doggo stew coming together: Chicken, sweet potato, spinach, oat meal, and assorted nutrition additives. All proportioned according to the recipe plan set out in my latest book: Questions and Answers About Canine Cuisine available at:

Q&A Canine Cuisine
Written  with Dr. Sandra Manes DVM

But it’s much more than a cookbook. 

This is a concise compendium of nutritional information to help you keep your fur baby healthy.  Don’t want to do the cooking?  That’s fine, it covers what you need to know to find a commercial diet that is safe and healthy.  Want to know about the new fad diets?  Dr Sandra Manes DVM and I cover those too.  All in a handy 7×10 paperback with full color photography. 

This book covers all aspects of canine nutrition and discusses everything from choosing a good commercial kibble to cooking your own dog food (including recipes). We also cover raw diet, grain free, all-meat, boutique meals, and we have a hard look at proper nutrition for dogs dealing with diabetes, heart disease, kidney disease, and cancer.  Tons of useful information presented for the average person in a lighthearted writing style.  This is one of those books you’ll refer back to often because it offers so much great expert information.

 ALL proceeds from this book support Piney Mountain Foster Care, a GuideStar gold seal rated 501(c)(3) rescue. EIN: 84-3593563.  Do your dog a favor, and support PMFC’s life-saving efforts: buy this book!

Kennel Project: Lumber Rack Removal

It’s Saturday.  Marie is home.  She can help keep an eye on the inside dogs, so I can work outside more than I can during the week.  I’ve accomplished several things, but the big task for today was to cart all the lumber on this lumber rack: (and if you can’t tell, that pile goes all the way up to the rafters),

Lumber rack on the wall to the left MUST go.

and move it to some place other than where it is: out of that building.  That means putting it in some other building where it will still be in my way, but in a different place.

I accomplished that:

Once I remove a few screws the racks will come down and the whole wall will be clear.

I also went ahead and laid out my divider walls, which is not as simple as one would think.

Originally I planned to make three inside kennels; each 8 feet wide to match the three outside kennels.  Simple.  We even cut the doorways in, on that thought.  But then I decided I didn’t need that much space in the inside kennels.  Too much room encourages dogs to poop in a far corner and live with it.  Less space means less temptation to do that.

I would like to have an inside space as an ICU room for recent surgery patients and dogs going through heart worm treatment.  That means a smaller space: 4′ x 4′ is enough.  I’ll take that dog outside on a leash.

That window you see messes up the idea of just dividing the remaining space into three equal rooms.  And I need to keep the doors in mind, leaving room on either side of the doors to mount slide hardware for vertically sliding doors to shut the dog in or out (and keep the cold out at night).

With the wall clear I did some laying out on the wall with an orange lumber marking crayon.  What works best is on the left, the 4 x 4 ICU, with the wall just to the left of the first doorway (currently being blocked with a piece of plywood to keep Siri where she belongs since the roll-up door is open).  Kennel #1 and Kennel #2 are 5 feet long (by 4 feet deep)  and kennel #3 is 6 feet 8 inches long.  This one could be used as a double should I have two dogs who cohabitate well.  Or one really big dog.

The walls between kennels will be 4″ wide concrete block, 6 feet high and I will cover the tops of the kennels with fencing like I did outside so dogs can’t climb out.  But not until I get the insulation in and drywall ceiling up and painted.  Each kennel will have a chain link front panel with a door (gate) in it so I can access the space from inside the kennel building.  Once the building is emptied of lumber I can use that big empty space for training and storage.

I’ll remove the roll-up garage door and fill in the opening with a combination of block wall (where the ICU  kennel is) and wood-frame wall (out in the main room where dogs won’t be likely to be digging at it or chewing on it).  Know anyone who wants a garage door with electric opener?  No remote, though.

I will seal the block walls and paint them some bright color.  I would like to use epoxy garage floor sealer to ease keeping the floors clean.  Since I don’t have a floor drain, interior clean-up will be done with a mop and bucket.

Last night I ordered all the chain link connectors, corners, clips, clamps, bolts, ties, and such from an on-line wholesaler I’ve used twice before and been happy with.  Next week I will go to Home Depot to get the top rails, tension bars, fence fabric, and the 36 cement blocks I need for the first divider wall.  None of that stuff can be economically shipped to me.  I hope it all fits in my truck!

Then I will try my hand as a block-layer.  A first for me, but … how hard can it be, right?

Hopefully I’ll do better than this!

High(way) Husky Adventure

About 10:00 last night Marie and I were traveling west along I-40 taking a pair of Huskies to meet their transport to NJ when the truck’s engine died.  Timing chain (belt) broke, I think, but I’ll leave that to the professionals at Eastport Exxon to figure out.  With cloudy skies it was really dark out there, a Thursday night: heaviest night of the week for semi traffic, which were whooshing by just feet away from us, rocking our truck with each pass.  The Huskies were scared and screaming their heads off.  If you’ve been around Huskies you know what I mean.  It’s a Husky thing.

What do we do now?

Marie started praying.  Always a good place to start.

I called the Cocke County Sheriff’s Department.  Although they were short handed and quite busy, a Sheriff’s car came up behind us to run flashing lights so no semis smashed us.  Deputies Alex and Heath turned out to be dog lovers and were not gruff with us at all for asking for their help.  In fact I think they enjoyed getting to see the inside of a rescue transport vehicle set up so animals can be taken in and out easily yet ride securely.

That transport, which we were supposed to be meeting at a truck stop on I-81, came to us (which meant going on to Newport, turning around and coming back to where we were) and we transferred the dogs.

The driver of this transport, Melinda, was having a horrendous night before I complicated it further.   Before she got to Nashville a tractor-trailer truck went off the road and burned, closing I-40 for an hour and a half while crews got that put out and cleaned up.  Then she hit another traffic snag in Nashville, so the rendezvous that was planned for 8:30 pm got shoved back to 10:30.  There was another wreck that slowed traffic after she left here and headed north, so it was a rough run for her.  We work with a couple of other transport services, and I’m not sure they’d have been so accommodating if all this had happened to them.  So, Thank you Melinda!

Hartford Towing sent a rollback right out there to snatch our truck from the roadside.  And Tim Holt came out, even as late as it was, to give us a ride home.  All coordinated perfectly (thank you God) so the rollback did not show up before Melinda got there, which would have left us standing alongside the Interstate with Huskies on leashes in the dark, being buffeted by tractor-trailer wakes.

Huskies in NJ
Adam and Cyrus: bewildered, but safe

Our truck is out of commission until it’s repaired, which might be a couple of weeks: they’re backed up too and I didn’t think to schedule this event ahead of time.  But no one was hurt, the dogs got where they were going, we met a couple of nice Deputies, and … it WASN’T raining!