The old saying about necessity being the mother of invention is absolutely true. In so many instances I have cobbled together something or other specifically to meet a need in the life of my family or friends. Even my life as a furniture maker was made successful because I could design pieces to meet the specific needs or desires of my clients. I find that even in making dog treats, I’m looking for ways to innovate.
Being Fussy About Dog Treats
 For the past few months I have been helping out our canine rescue group: Steele Away Home, by making healthy dog treats that are sold in Cedarwood Veterinary Hospital. The purchase price of these treats gets applied to the rescue’s medical bill at Cedarwood. This is one of several efforts Marie and I do as The Julian Fund, which raises funds specifically for S.A.H.’s veterinary bill.
The treats I make come in several flavors, and are 7/8” diameter. It is best if they all come out a uniform thickness, but that is hard for me to achieve: I’m just not all that talented with a rolling pin. One edge ends up thinner than the other, or all edges are the same, but the middle is thicker. Being a little bit of a perfectionist, I like consistency. Okay … I’m more than a little, and this is more than a pet peeve. I need to solve this problem.
All manner of crazy ideas flitted through my mind as I rolled dough: using something like my drum sander as a dough rolling machine, or making some kind of press that would squash a ball of dough out to a consistent thickness quickly and easily. But these were impractical: much too complex and expensive.
What I really need here is a simple rolling pin guide: something to keep the rolling pin from dipping too low, creating thin spots. The cutting board I use for dough-rolling is circular (I made it for use in cutting our Saturday night, home-made pizzas), so my first thought was to make a ring out of thin plywood that would fit the circumference of the cutting board. For a variety of woodworking reasons that are not relevant to this discussion, that thought was deemed impractical due to the time and effort involved.
The Simplest Means Is Often the Best
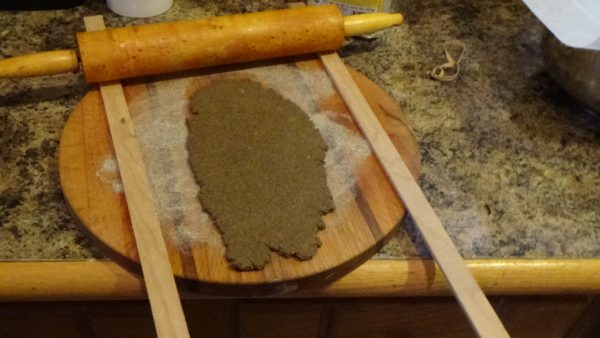
Then it occurred to me that I don’t have to roll out a circular patch of dough, and as a test I could simply cut strips of plywood: quick, easy, consumes little material. Little is lost if it doesn’t work out. So I popped over to the workshop and made it so.
The result was GREAT!
 Because the strips are laying loose on the board, I have to be careful when I get to the ends: the board being circular leaves the ends of the strips unsupported so they will tip up and divot the dough. And I have to be careful to keep the strips clean: bits of dough or caked flour on top of the strips causes ridges, clumps under the strips cause thick spots. The few moments it takes to scrape off the strips occasionally is more than compensated by the vastly improved speed of rolling the dough.
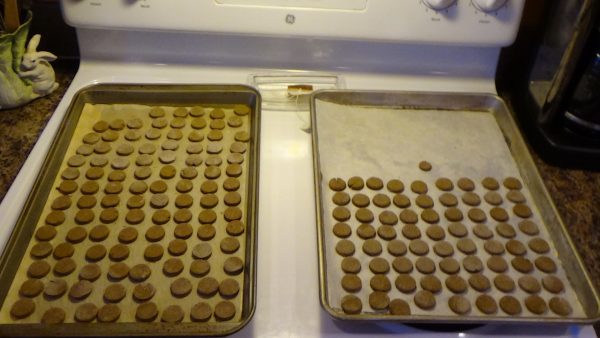
 The end result are trays full of consistently sized treats. That makes me happy. The dogs don’t give a hoot what the dog treats look like as long as they taste good. They always get samples on cookie baking day, since I torture them for at least a half-day while making up multiple batches of these mini-cookies.
About These Dog Treats
On special occasions, I make cheesey dog treats – but these are just for my dogs (including fosters) because they use real cheese and should be refrigerated even after baking. The buckwheat-pumpkin treats (grain free for dogs with allergies) are shelf stable for a few days, refrigerate for longer storage. The peanut butter dog treats have a shelf life of a couple of weeks. If you buy these in bulk, keep the extras in the freezer, then refill your cookie jar as needed.
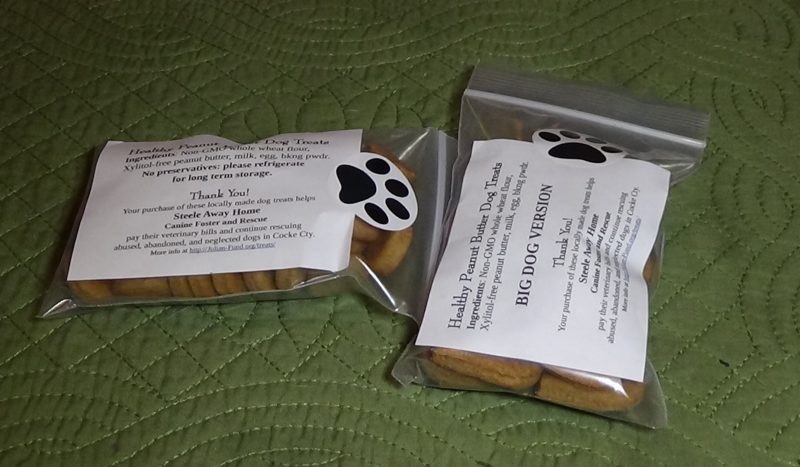
 I package the dog treats in food-safe cello bags with a label containing the ingredient list and stating that all ingredients are organic and free of hazards like Xylitol (a sweetener commonly used in peanut butter: safe for humans, poisonous to dogs).
Details of these recipes are available at The Julian Fund cookie page.
Dough Board Of the Future
What’s in store for my dog treat dough rolling board? I’m thinking of making up a rectangular board with the side strips glued to the board’s long edges. The bottom needs a non-skid surface (rubber shelf liner) to keep it from sliding around on the counter, and of course it needs an easy to clean, food safe finish: probably mineral oil like all my cutting boards.
To further help in keeping it clean, I want to eliminate the 90° corner where the side strips meet the cutting board surface: dough and flour will want to stick in there. If I use solid strips of wood instead of plywood (plywood would tear out, leaving a rough surface), I could glue them onto the board then use a very small cove bit in a router to cut the edges back and leave a rounded transition. Or I could use wood putty to create a fillet – but that will be subject to cracking and flaking out with use and washing.
Since this is not for show, it does not have to be pretty or fancy. Utilitarian is good enough for production work. I’ll come back and update with a photo when the board is done and in use.
| If you enjoy our updates, Doggy Tales, and educational articles consider subscribing for notices when new pieces are posted. It’s painless and you can unsubscribe any time you want. Your e-mail address is used ONLY to deliver these notices. | [email-subscribers namefield=”YES” desc=”” group=”Public”] |


